I. How to Build UBLearns Content


This section demonstrates how to build UBlearns course content for the online learning environment. There are multiple ways to design your course; these examples should help you get started.
On this page:
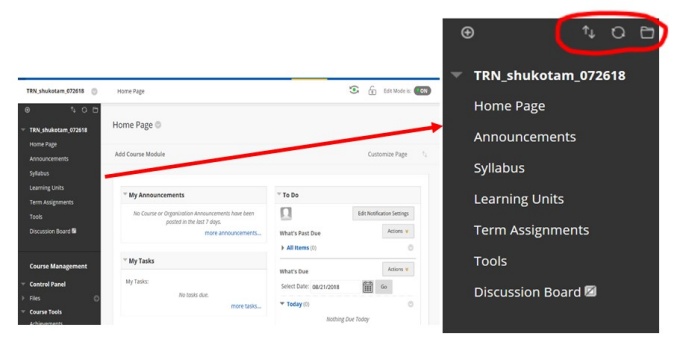
a. Organizing the Content Menu
- First, go to UBlearns page.
- Select the course you are teaching from My Courses
- Locate the “Content Menu” column in the top left corner
- You can build and edit the column contents by clicking one of the icons circled red. (Note: the example below is not a default Content Menu setting)

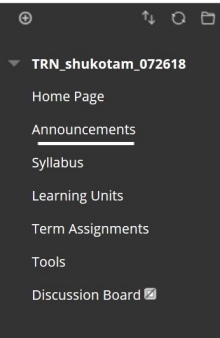
b. Announcements
This is the entry point of course-wide communication. The UBlearns specialist at the UB Center for Educational Innovation (CEI) recommends that you master the Announcements menu for class wide communication such as your introduction to the students at the start of the semester or for assignment information. After an announcement is made, an automated e-mail will be sent to the students.

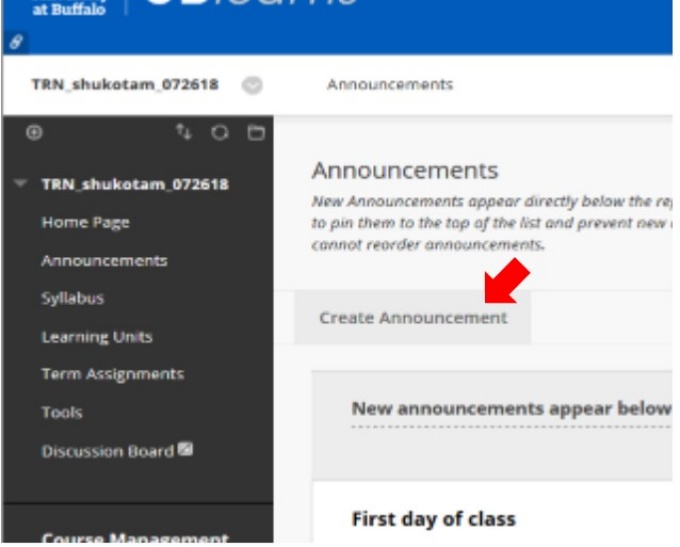
To create an announcement:
- Click on Announcements in the Content Menu
- Click on Create Announcement
- After creating a message, click on Submit button on the lower right corner

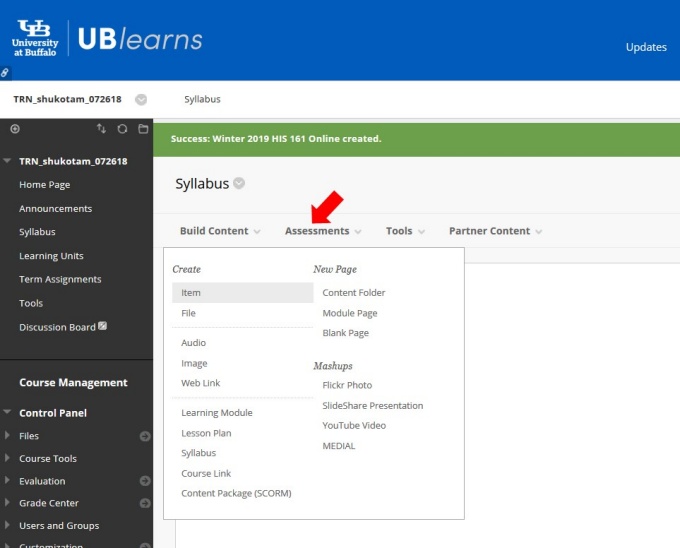
c. Syllabus
To upload your syllabus:
- Click on Syllabus in the content menu
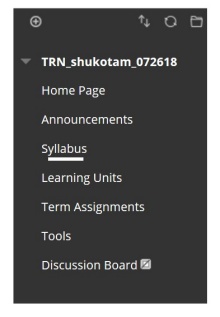

- Click on Build Content to the right (see screen capture)
- Select Item
- Scroll down to Attachments and upload your Word or PDF file, then click on Submit

For more information about syllabus making, please refer to Section V: “Online Resource for Course Design.”
d. Learning Units
The Learning Units menu item is where you can post the Panopto lecture video (for use of this function, go to “II. How to Stream Your Lecture”). You can also upload additional material such as YouTube videos and PDF reading assignments, as well as unit assignments in a single Content File.
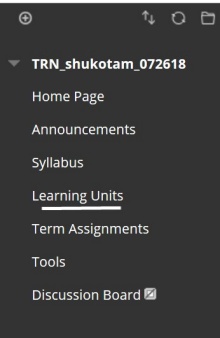

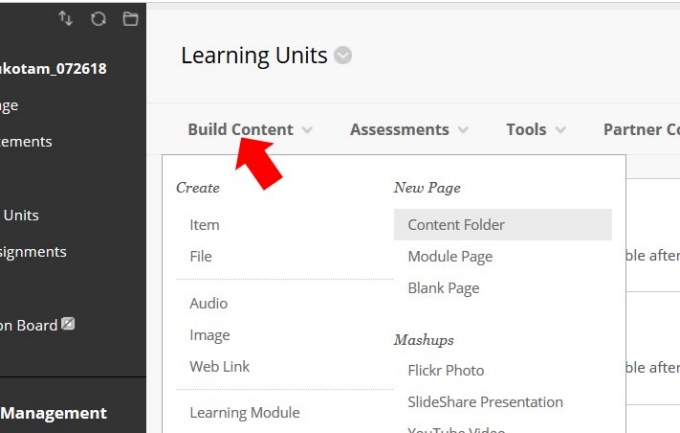
- To create a Content File, click on the Learning Units in the Content Menu first
- To create a unit, click on Build Content, then click on Content Folder to the right
- Name your Content Folder (For example: “Unit 1” or “Week 1”)

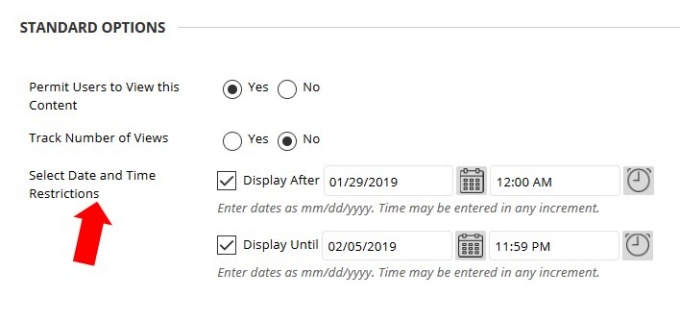
In the example below, learning units are organized into three Content Folders. You can set a specific timeframe to release each lecture session to students on specific dates. Notice how it states: “it will be available after Jan 29, 2019 12:00 AM”:
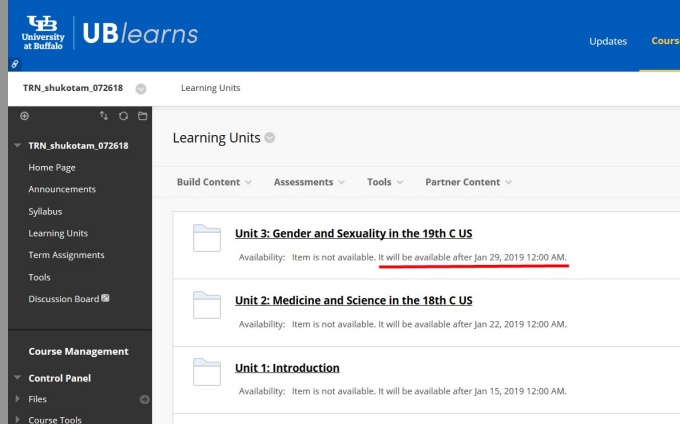

- To set the time and date for document release scroll down to the Standard Options section of the Create Content page
- Set up the time release function under Select Date and Time Restrictions. You can do this while you are building a Content Folder

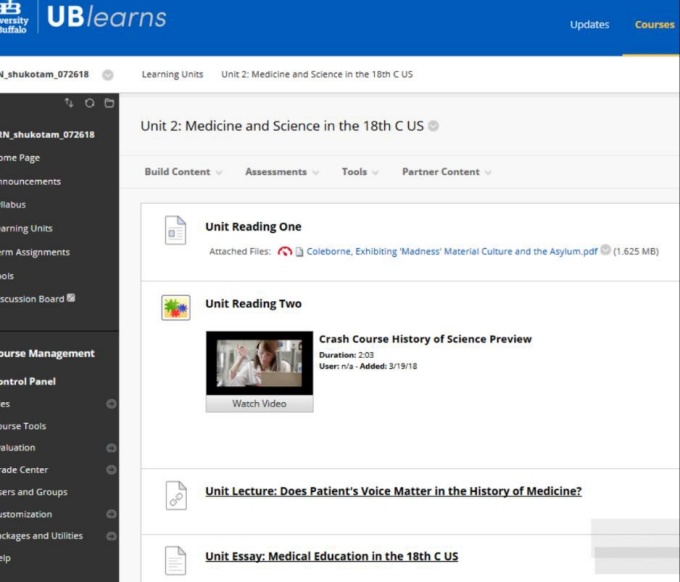
You can upload a word file, PDF file, YouTube clip, Panopto lecture recording, essay, quiz, etc. into a single Content Folder. In the example shown below, assigned readings, a lecture video, and an assignment are included in the same Content Folder which has been named “Unit 2: Medicine and Science in the 18th C US.”

e. Assignment Building
The test building menu offers a plethora of choice including Multiple choice, True/False, Essay, and more! You can mix and match various options, including essay writing, into one test. The completed test will appear in the Grade Center as Needs Grading. (Please see “g. Grading.”)
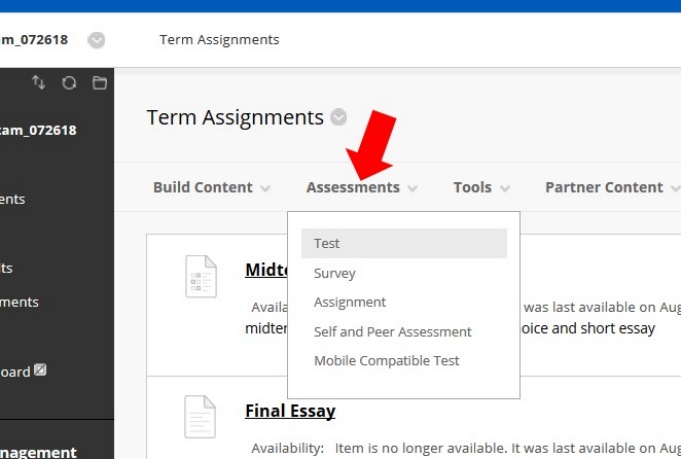
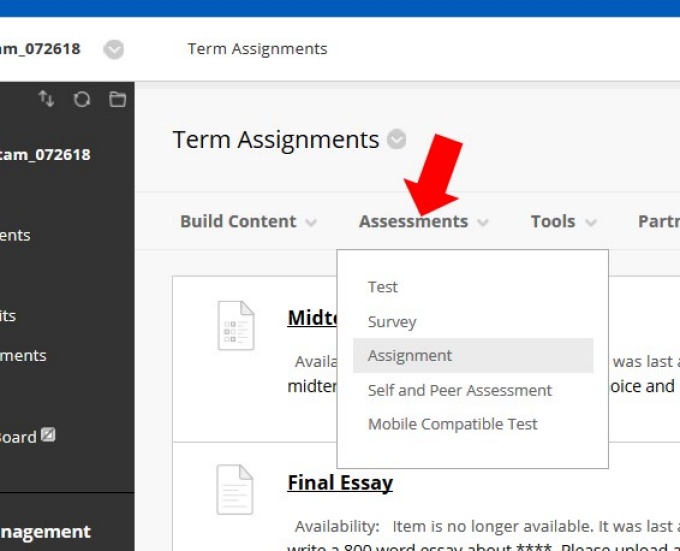
- First, click on the Term Assignments item from the content menu

- To start building a test, go to the Assessments dropdown list, then choose Test

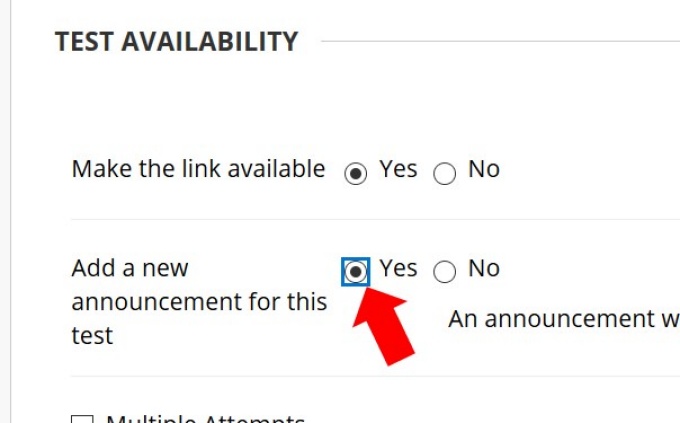
- When building a test, you will have several additional options. For example, the Test Availability section lets you send an automatic announcement to students that the test is ready to download
- Click Yes in Add a new announcement for this test
- You can also build a rubric for an assignment. Please see “f. Grading” for detail

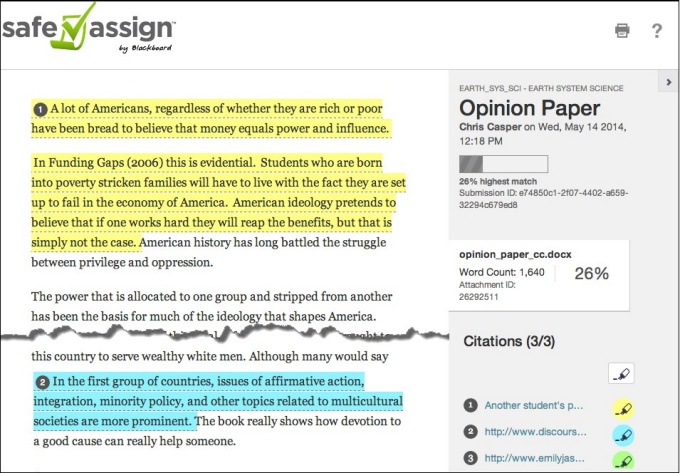
You can also build an essay assignment with the SafeAssign function. Safe Assign is a plagiarism detection software. You can compare students’ submitted essays with websites and academic papers to detect whether students copy & pasted their answers from somewhere else.
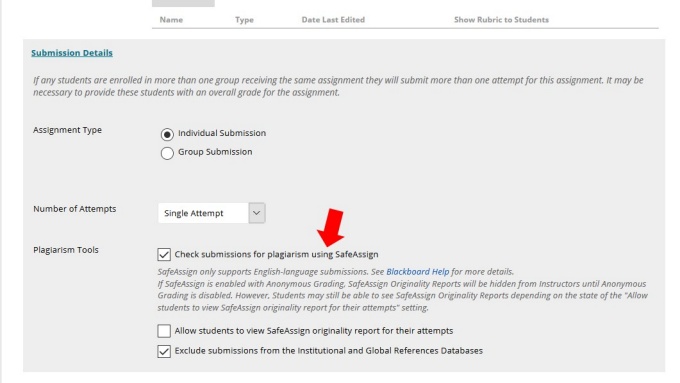
- In order to build an essay assignment with the SafeAssign function, put the cursor on the Assessments, then choose Assignment
- Then, in the Submission Details section (see image on next page), choose “Check submissions for plagiarism using SafeAssign” to enable the function. You may check “Exclude submissions from the Intuitional and Global References Databases” for an undergraduate survey course


When you grade essays with the SafeAssign function, you will see whether the submitted essay has been copied from another student’s paper, specific website, etc.

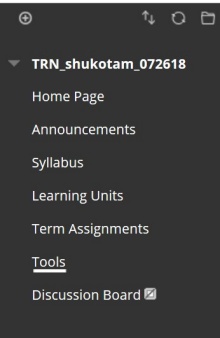
f. Tools
You can divide your students into a few groups to carry out group assignments such as Blogs or Discussion Boards. In doing so, you need to create groups manually, but the good news is that you can reuse these groups for multiple activities.
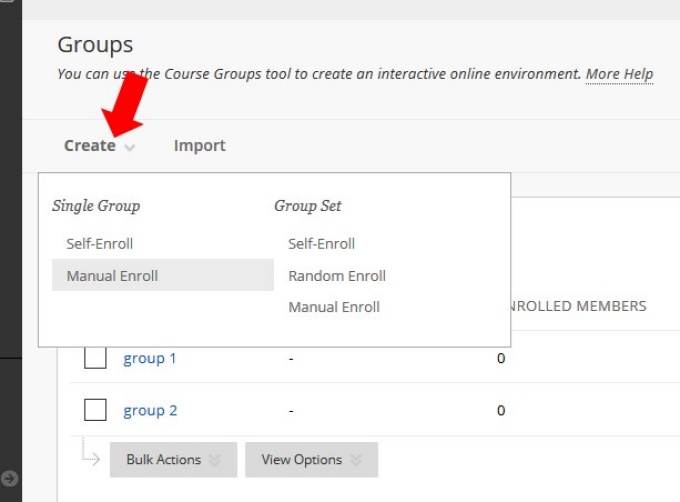
- To create student groups, click on Tools in the course menu, then Groups

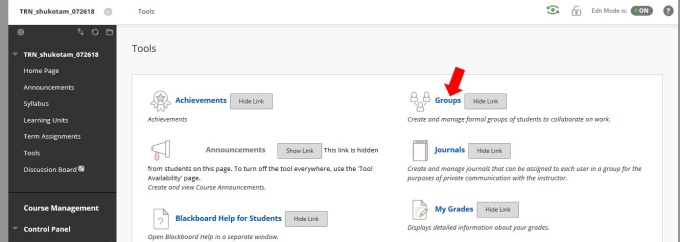

- Click on Create, then choose Manual Enroll so that you can assign students by yourself
- Usually, four to five students are assigned into one group, but it is totally depending on how your assignment is designed

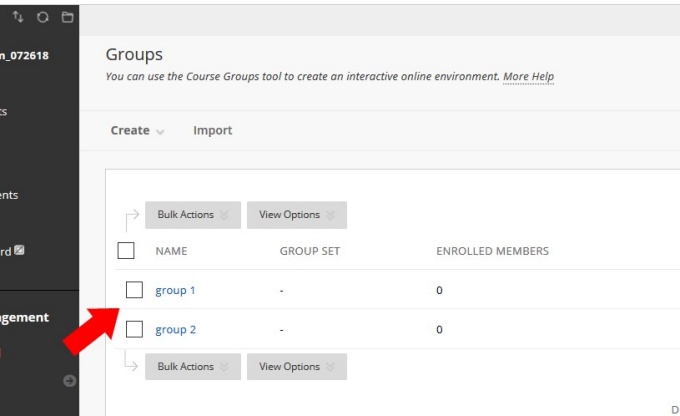
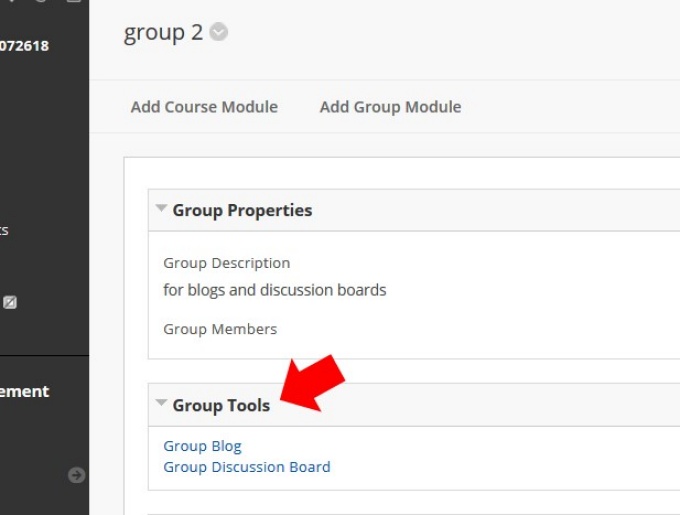
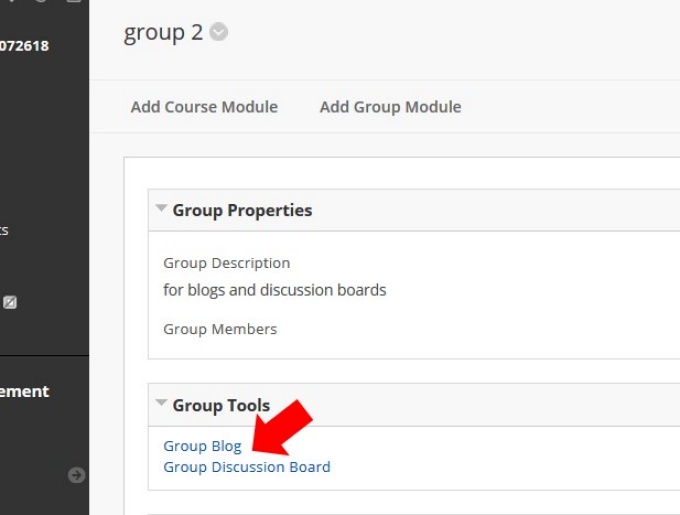
- In order to access the group page you have just set up, click on the Tool menu again, then select Groups, and your newly created groups will be listed
- To create a discussion board for each group, select an individual group page by clicking “group 1” or “group 2”

- In each group page, you will see the Group Tools options such as Group Blog, Group Wiki, etc.
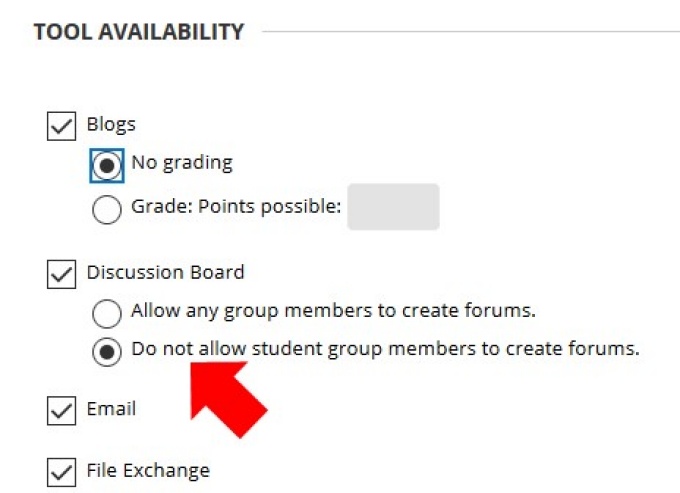
- To make a group discussion assignment, click on the Group Discussion Board to create a Discussion Forum

- In order to prevent chaos, never let students create a Forum. You might consider letting students create a Thread, but many instructors have found it easier not to let students make threads, either

A sample discussion thread would look like the following image:
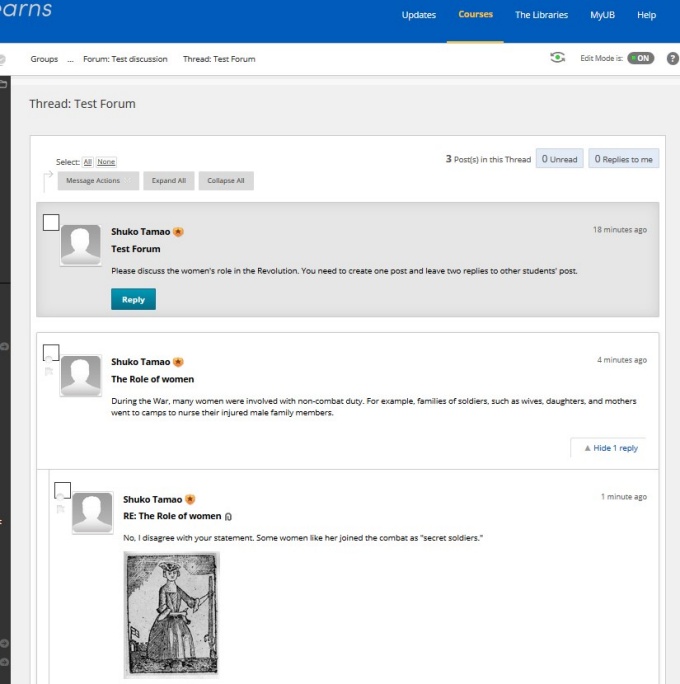

Needless to say, there should be more than one participant. This is one lonely mock discussion board. Students can add their responses and leave replies here. If you want a lively discussion, a prompt should be more elaborate than the one included here!
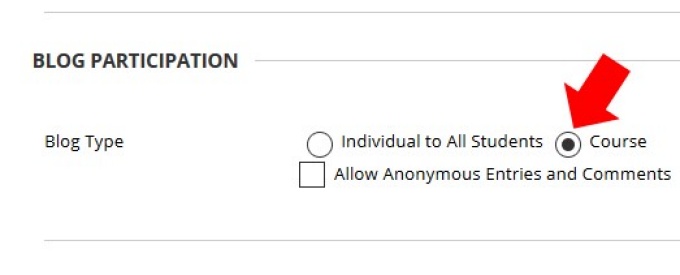
- To create a group blog, go to the group page again, and click on the Group Blog

- Make sure to set the blog as either course, individual, or group. In a course blog, everyone in the course can post and comment. In an individual blog only the “owner” can post, and other course members can only comment on the post

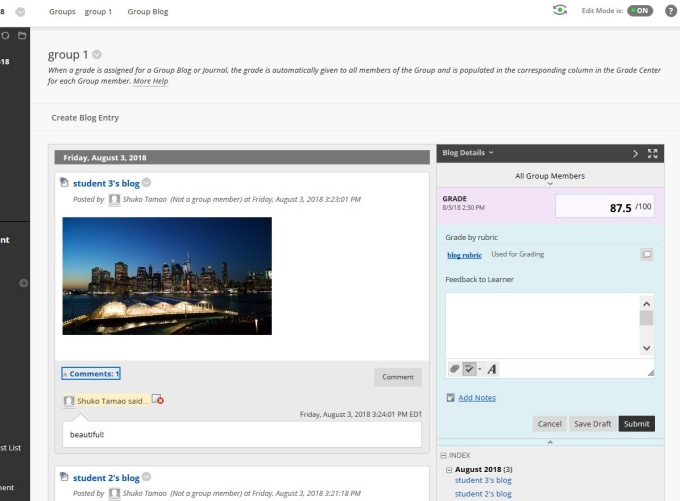
A sample blog would look like the image below. By the way, never let students post a photograph only blog entry or a one-word comment like this sample! For your information, I took this picture from the Brooklyn Bridge Pier. Pretty, isn’t it?

…Or you might consider using following non-UBlearns services for group assignments:
Flipgrid
A video discussion platform for the snapchat generation!
Instagram Stories
This Instagram feature lets students post photos and videos that are available for only 24 hours.
Google Apps via UBmail
Students can use Google Calendar, Docs, Drive, and Hangouts for their collaborative assignments.
g. Grading
- You can access the Grade Center in the Course Management section of the Content Menu on the left
- If ungraded students’ assignments are submitted, they will show up in the Needs Grading section after you click on Grade Center
- In the Full Grade Center below that, you can see all the students’ assignments. This is where you can calculate students’ final grades by creating a Weighted Column

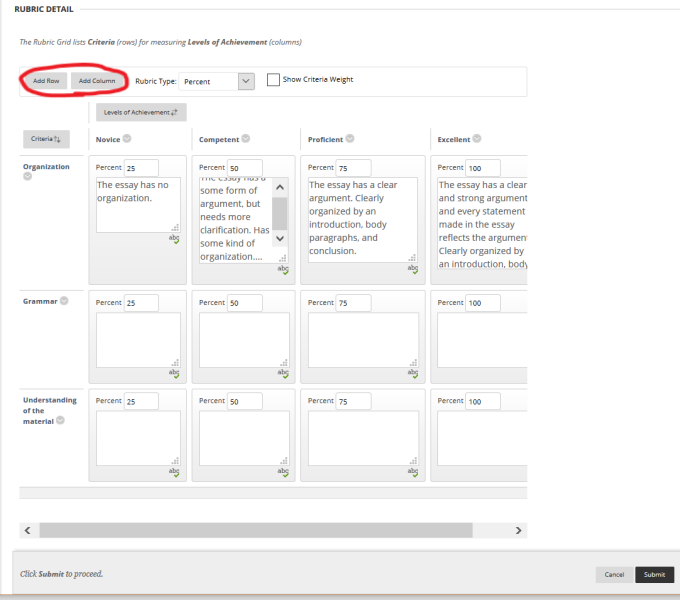
A few words on Rubrics: When you are building assignments, you should create rubrics for every kinds of activities possible (i.e.: Essay Rubric, Discussion Board Rubric, Blog Rubric, etc.). Not only do these rubrics save time when grading, they are a useful tool to justify your grading to students, thus reducing the number of students inquiring about their grade!
- When you a building an assignment, you will have a choice to attach a Rubric in the Grading Section
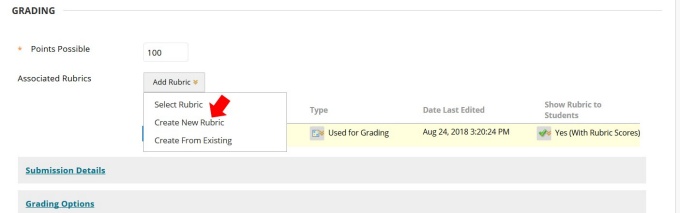

- If you select the Create New Rubric option, you can generate your own rubric criteria by adding, deleting, and editing columns and rows. You can create multiple rubrics, and they will be stored so that you can keep reusing these rubrics throughout the course

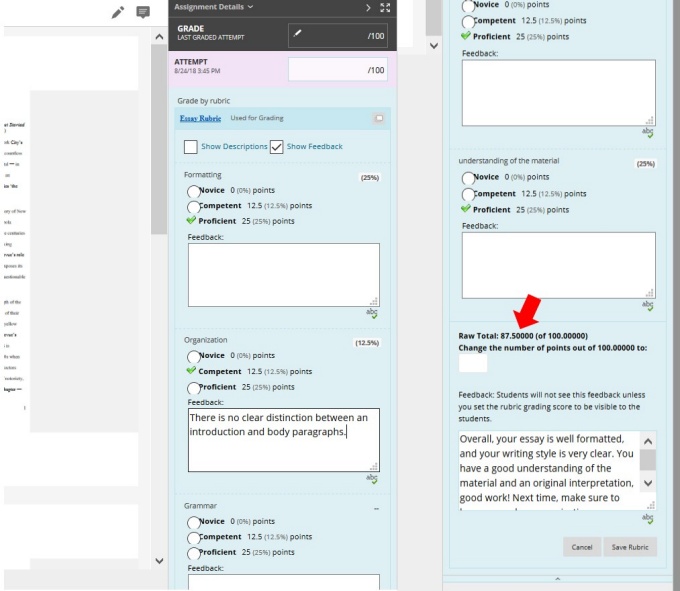
When a submitted assignment shows up in the Grading Center as Needs Grading, you can grade the assignment by following your rubric guide. You can even leave feedback for the student. After the selecting appropriate scores for each criterion, the rubric function will calculate the student’s grade for you.

h. Virtual Office Hour Tool
Webex
UB faculty members and students can use this web conference tool with video and audio connections for virtual office hours.
i. Resources for UBlearns
UBIT Help Center: 716-645-6188 or ublearns@buffalo.edu
Getting Started with UBlearns (overview of basic functions)