

II. How to Record and Stream Your Lecture
On this page:
a. UB Panopto
If you do not have a clear software preference when it comes to record and stream your lecture, UB Panopto is the choice for you. You can download the software here. Make sure that your computer’s camera and microphone can be recognized by Panopto.
UBIT has a user-friendly step by step guide, ranging from how to install the software to upload the lecture video to your UBlearns site, as well as from how to edit your video to adding captions in your video lecture. Thus, this section introduces just enough information to get you started.
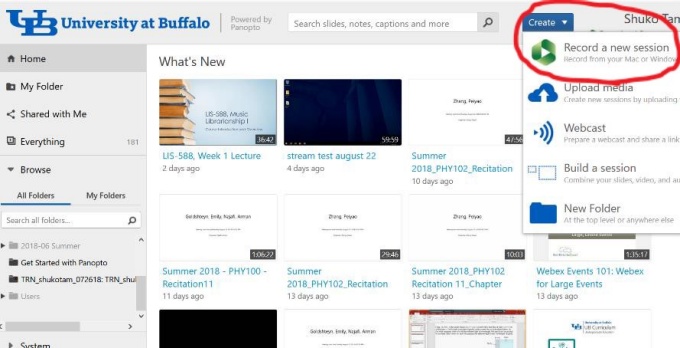
After you download the software, you can begin recording your lecture. Click on the “Create” drop down list and choose “Record a new session.”

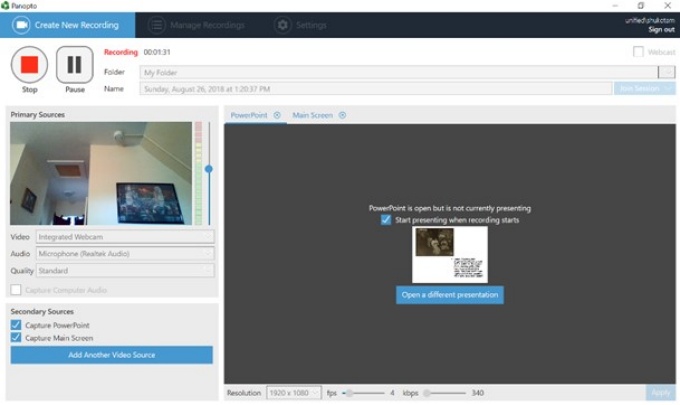
The recording screen will look like below. The left hand side screen is where you appear during the lecture. You can synchronize with your PowerPoint presentation during the recording, which appears on the right.

Panopto Basic Functions:
Step by step basic How to use guide
Some other Functions that might be Useful:
Panopto Support Groups:
More Ways to Learn about Panopto
Panopto Webinars (basic training webinars held twice a month)
b. Youtube
If you are already proficient with YouTube video streaming, you might stick with them. UBlearns supports YouTube, and linking the video to your lecture would be an easy task. Currently, they have better caption service than Panopto. But please be aware that your lecture would be available to the whole WWW!