Building a Faculty Profile
Build a directory to promote your faculty, with a standardized design that supports different department needs.
Additional Resources
Creating a faculty profile involves 2 parts:
Part 1: Shared Content Profile
Shared Content is material that is intended to be used in more than one place at the same time. This efficient practice is encouraged within the UBCMS. Shared Content is created once and then can be displayed many times. Different people can control production of the shared content, completely independent of the people responsible for the pages where it is being displayed. Once the shared content reference is set up, new shared content can flow onto unit webpages, without any need for further involvement by the authors maintaining those pages.
In summary, shared content is a highly effective means of:
- Being consistent when using the same information.
- Updating all instances of information simultaneously.
- Providing authoritative sources of information.
- Reinforcing the UB brand (for University-Wide and Authoritative content).
- Sharing common feeds, such as news and campus events feeds.
Part 2: Host page
When you use shared content in your site, one of your regular pages acts as a 'host' to provide the navigation and header/footer elements. For example, when you include shared content through a Shared Content Reference, the shared content is immediately displayed on that regular webpage, which acts as the host.
Step 1: Navigate to faculty profiles in shared content
- Open the UBCMS and navigate to Shared Content > College of Arts and Sciences > [Department]
- Note: there are 2 different CAS folders. Make sure to select the one where your department is listed (/content/shared/arts-sciences/ or /content/shared/cas).
- Find your department.
- Open Faculty Profiles (could be titled as “Department Faculty”, “Faculty” , “Meet Our Faculty”).
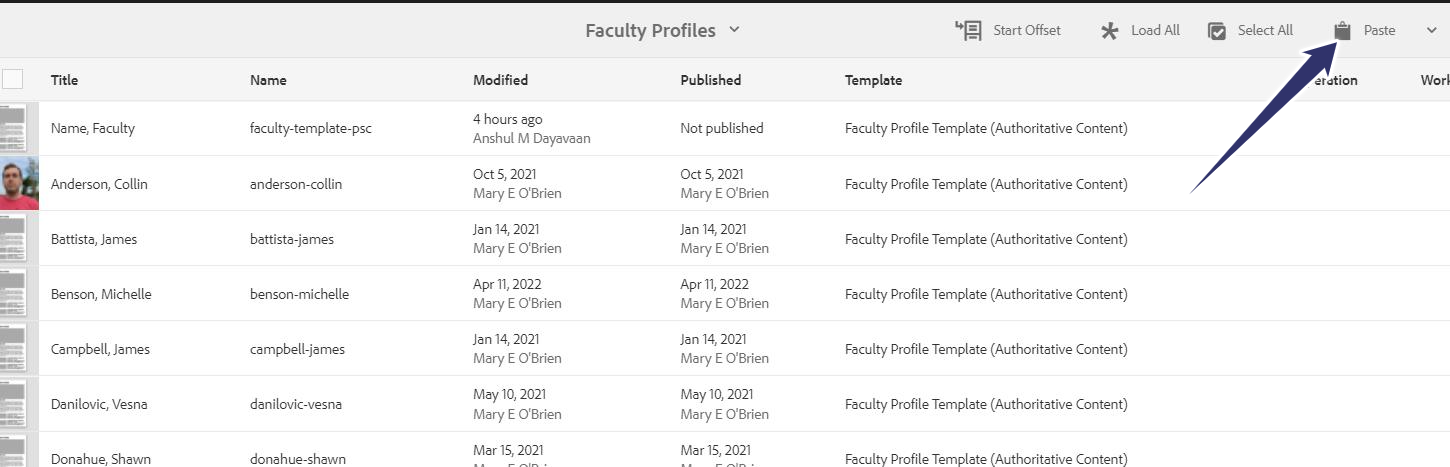
Step 2: Copy an existing profile
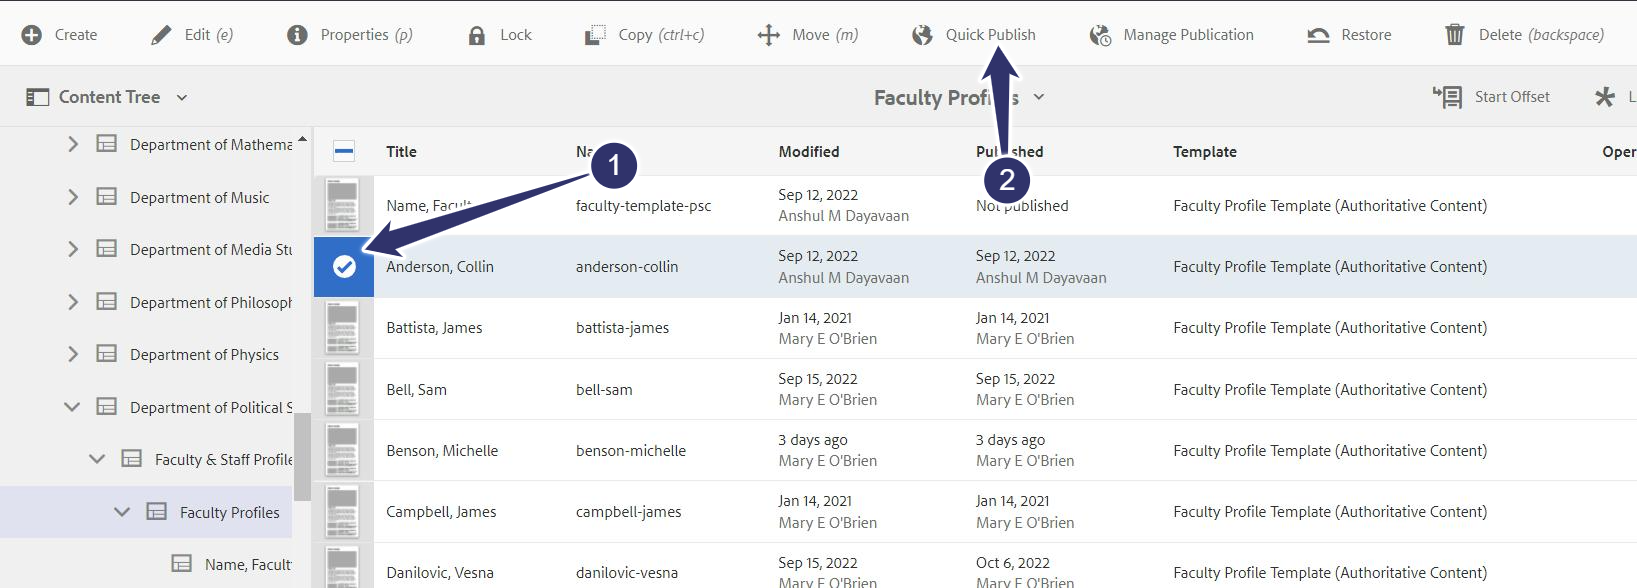
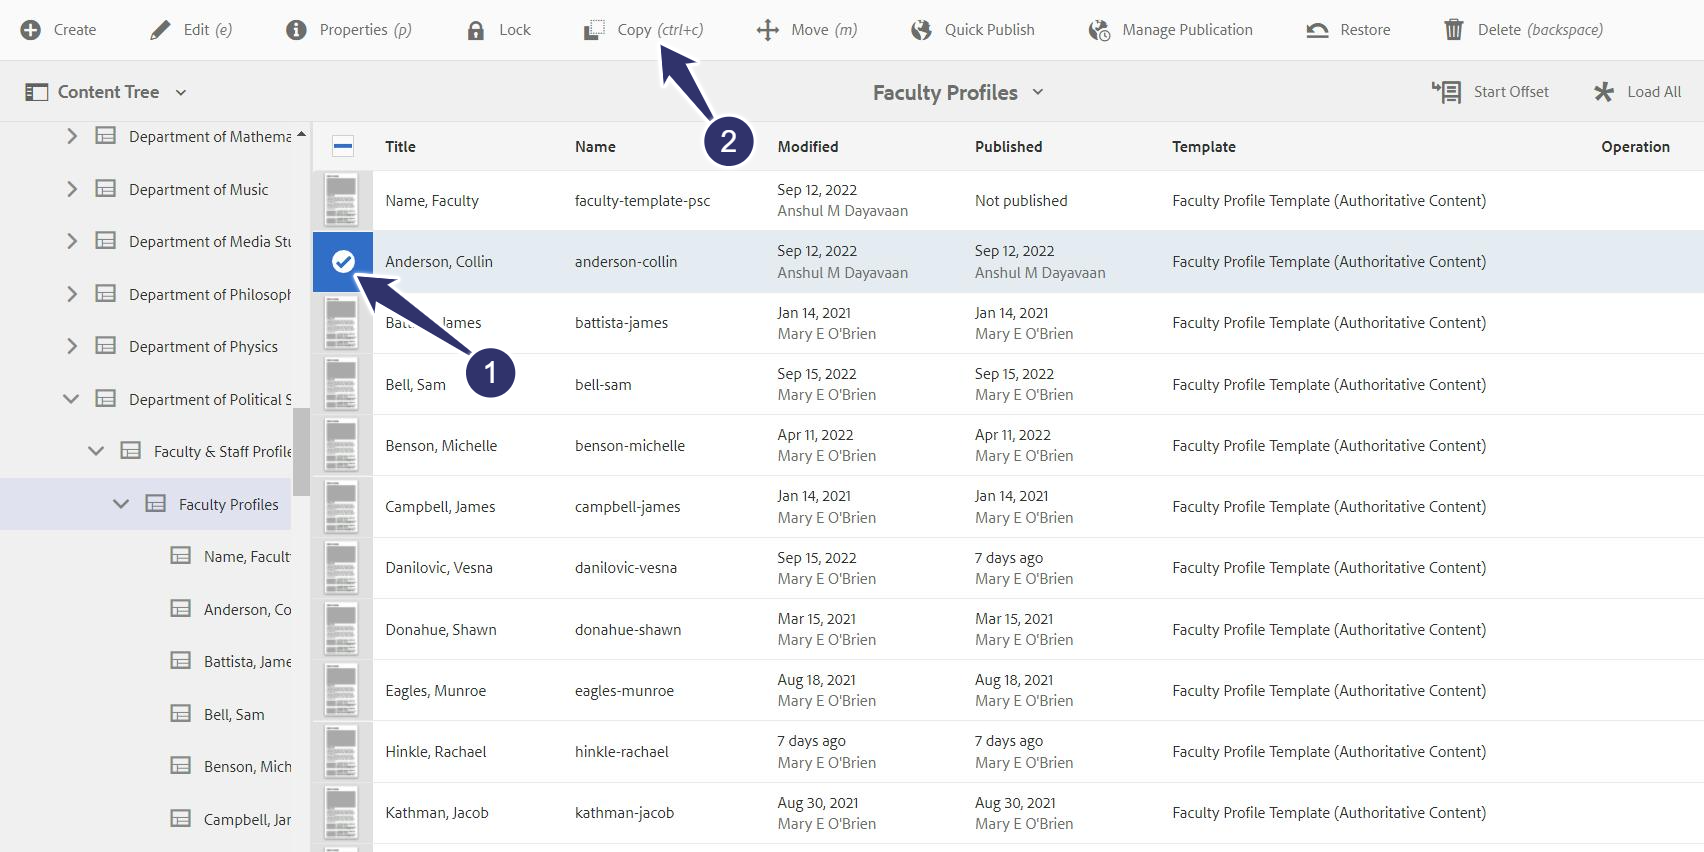
- Find and select any one of the already existing faculty profiles. For this example, we are using the profile of Anderson, Collin.
- Select the thumbnail (1.) of the profile so the checkmark appears.
- In the toolbar, click “Copy” (2.).
- After clicking “Copy”, you should see a second toolbar appear.
- Select “Paste” to paste the page into the same folder.
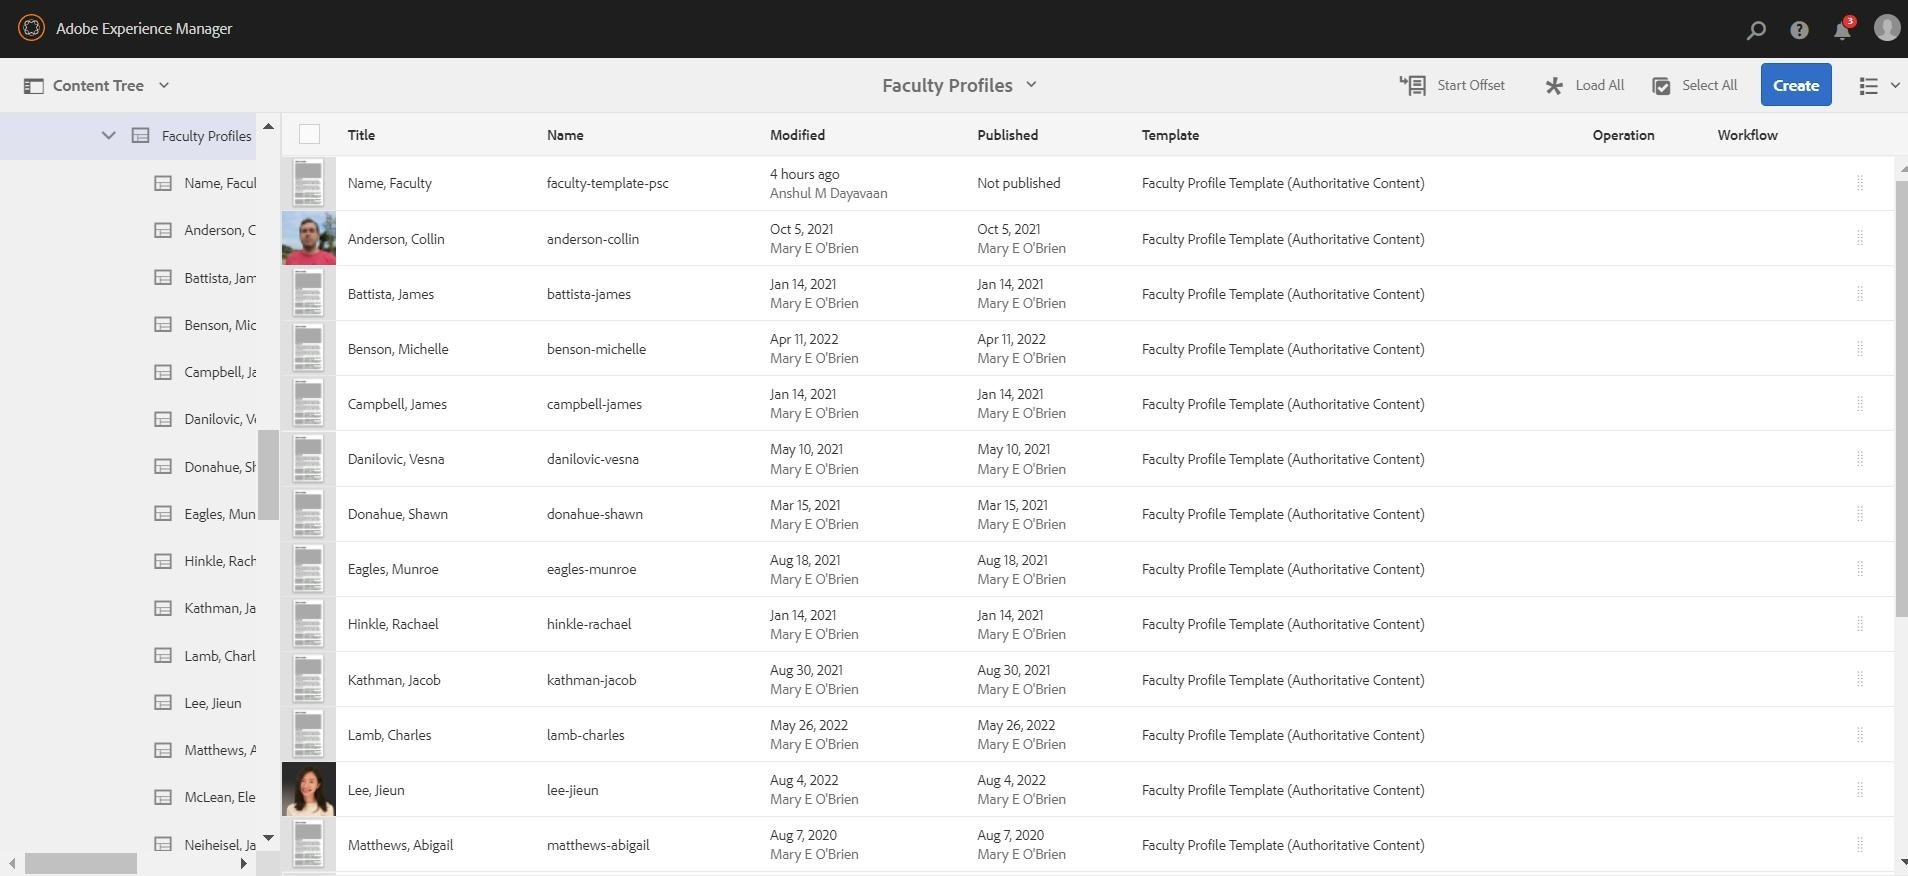
- You should see the copy/pasted page at the bottom of the list.
- Make sure it was modified a few seconds ago (highlighted below).
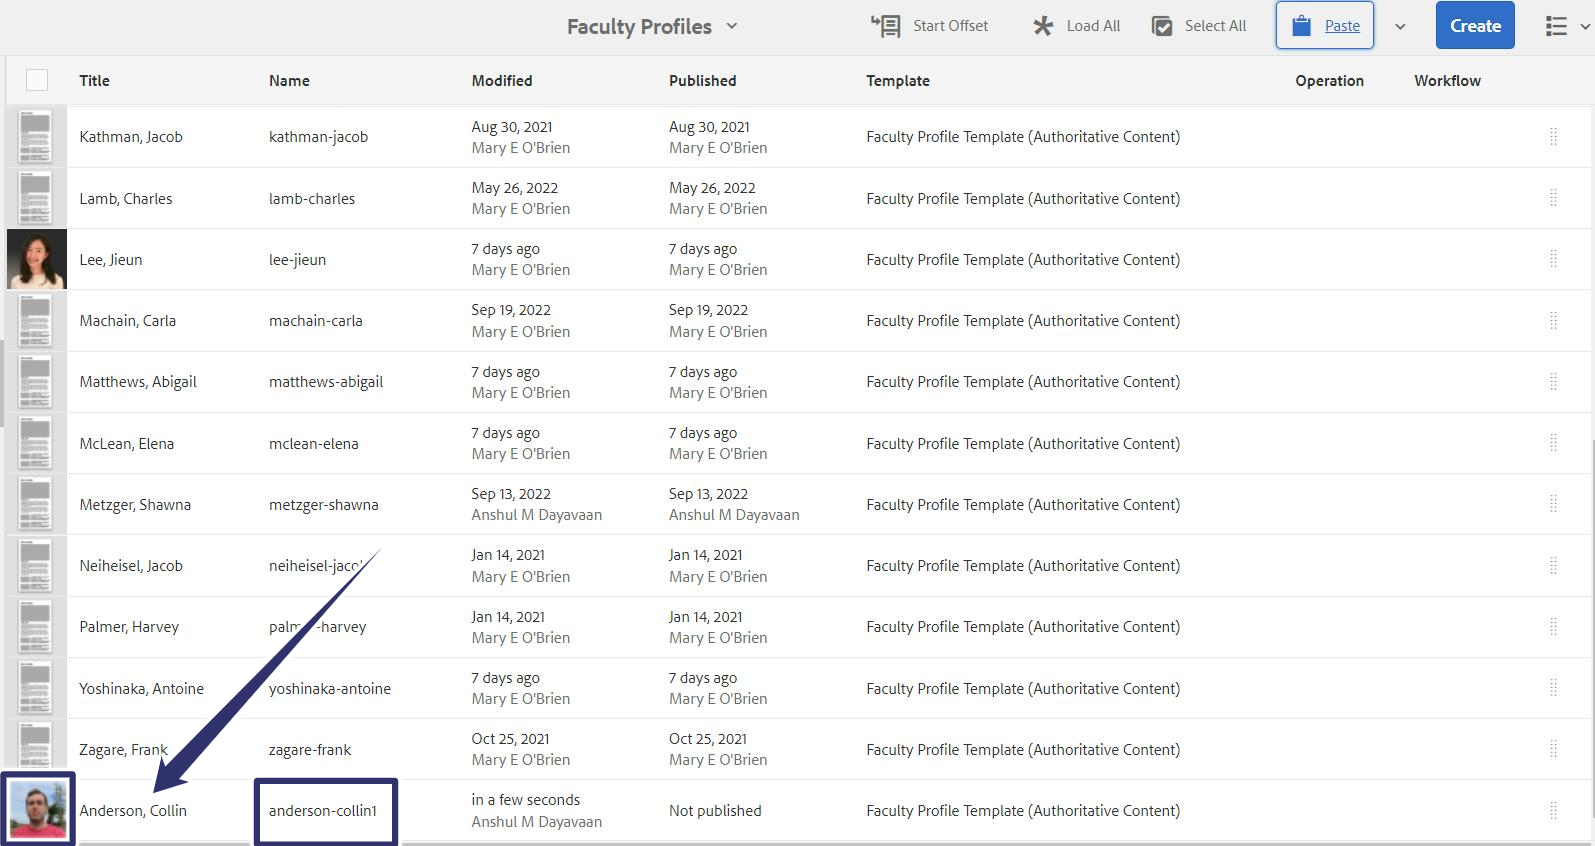
- Select the new page by clicking the thumbnail.
Step 3: Change the title and name of the copied faculty profile
Change the Name and Title of the page to the new Faculty name.
Note: Make sure the format matches the rest of the profiles (First-Name,Last-Name; Last-Name, First-Name etc):
- With the thumbnail highlighted blue, click “Move” in the Command Menu that is now revealed at the top of the screen.
- A new page will appear, with the Title and Name plus information about the page (last modification and the number of references to that page).
- Make any changes to Title and Name then click “Next”.
- A new page will display requiring the destination.
- Select the destination as the current location. Click “Move”.
More information on changing names and titles of pages can be found in the UBCMS documentation.
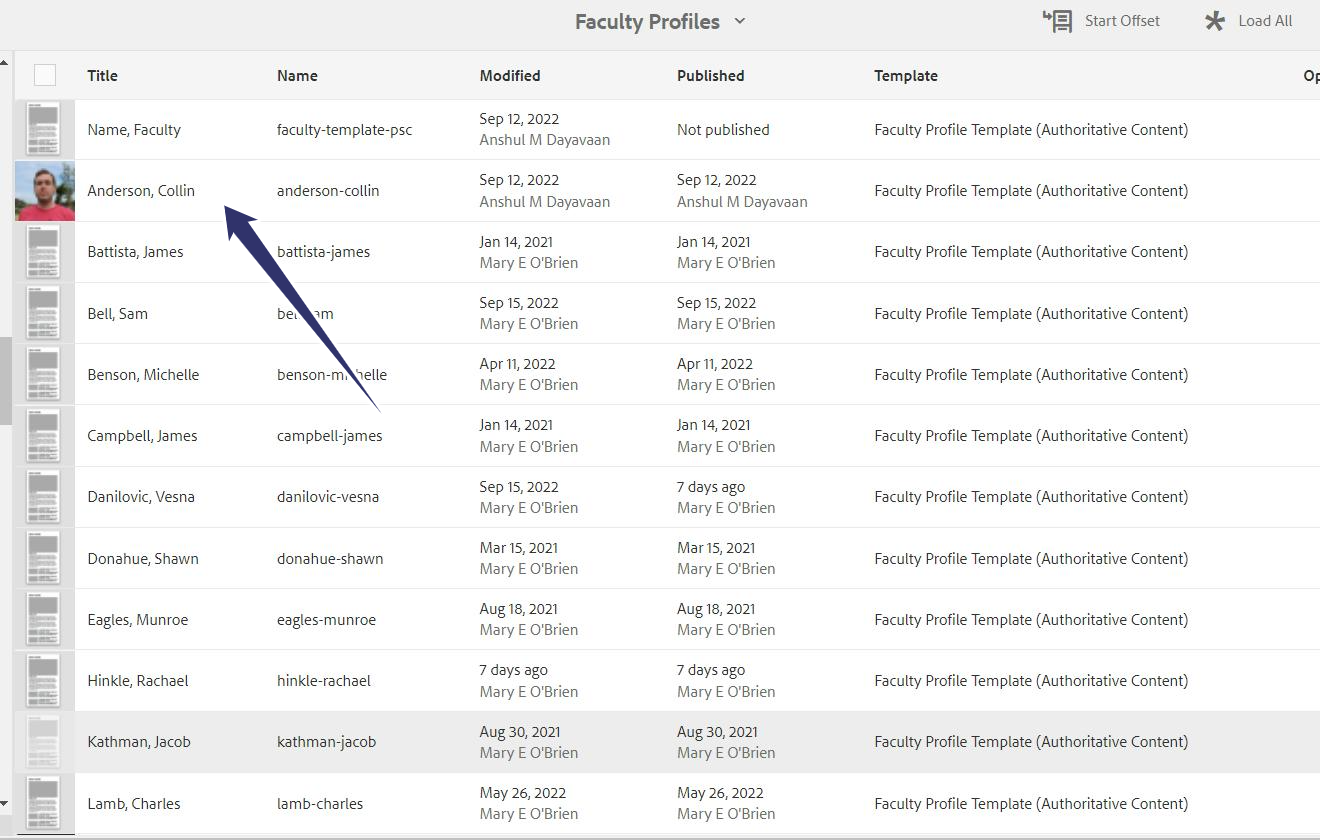
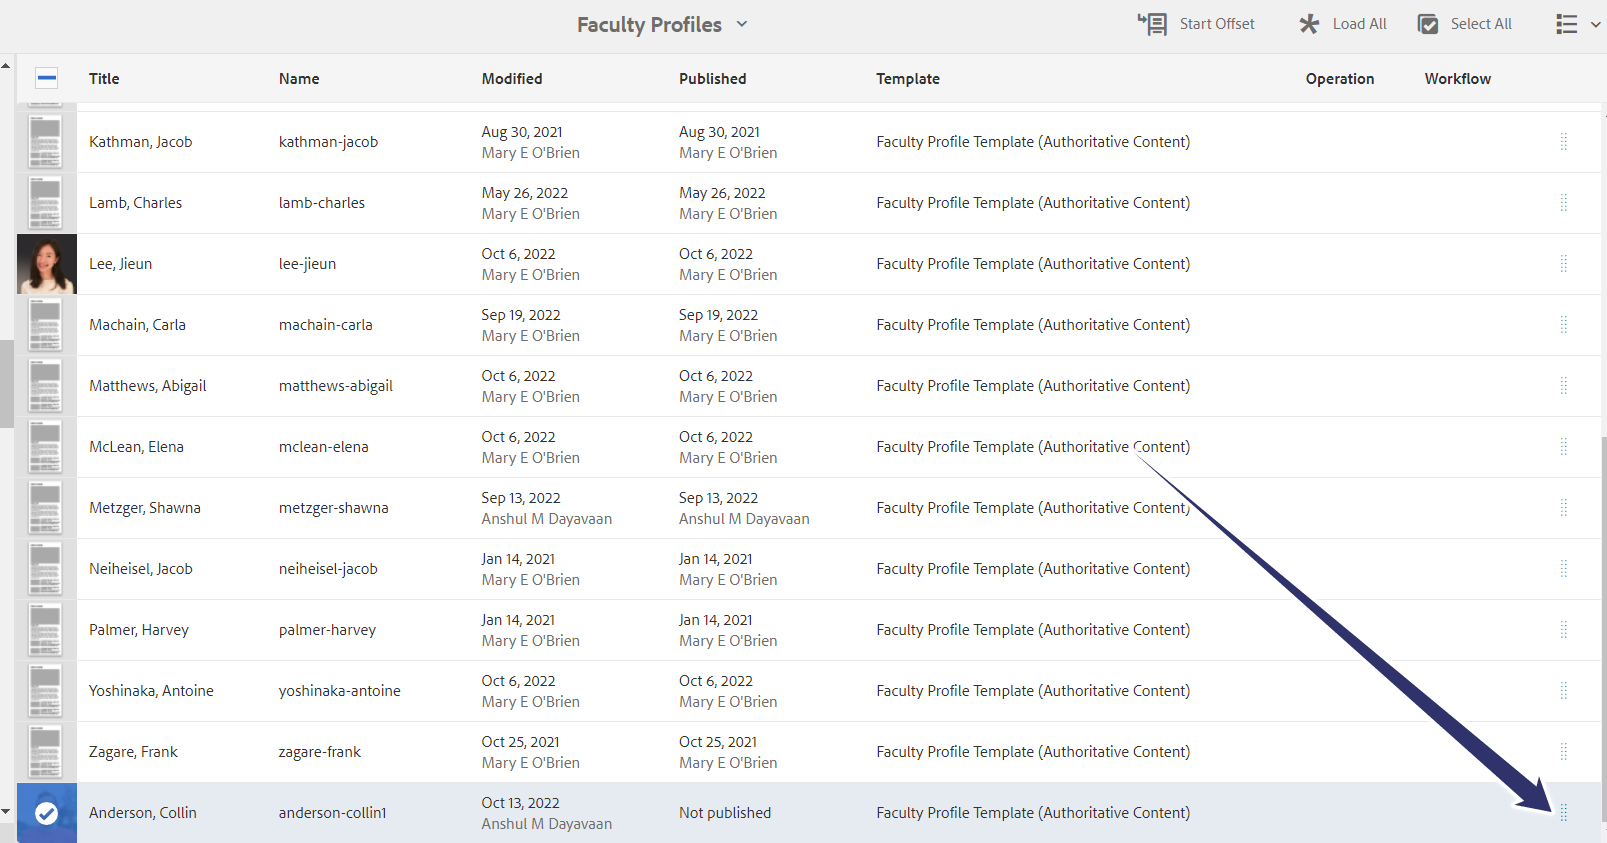
Make sure the newly created profile page follows the alphabetical order like the other pages in the faculty profiles directory. Drag and drop a page up/down the List View (i.e. within the same 'folder') by dragging the 'domino' icon drag handle located at the right end of the page title (it looks like two vertical rows of dots).
More information on reordering pages can be found in the UBCMS documentation.
Step 4: Open the edit mode
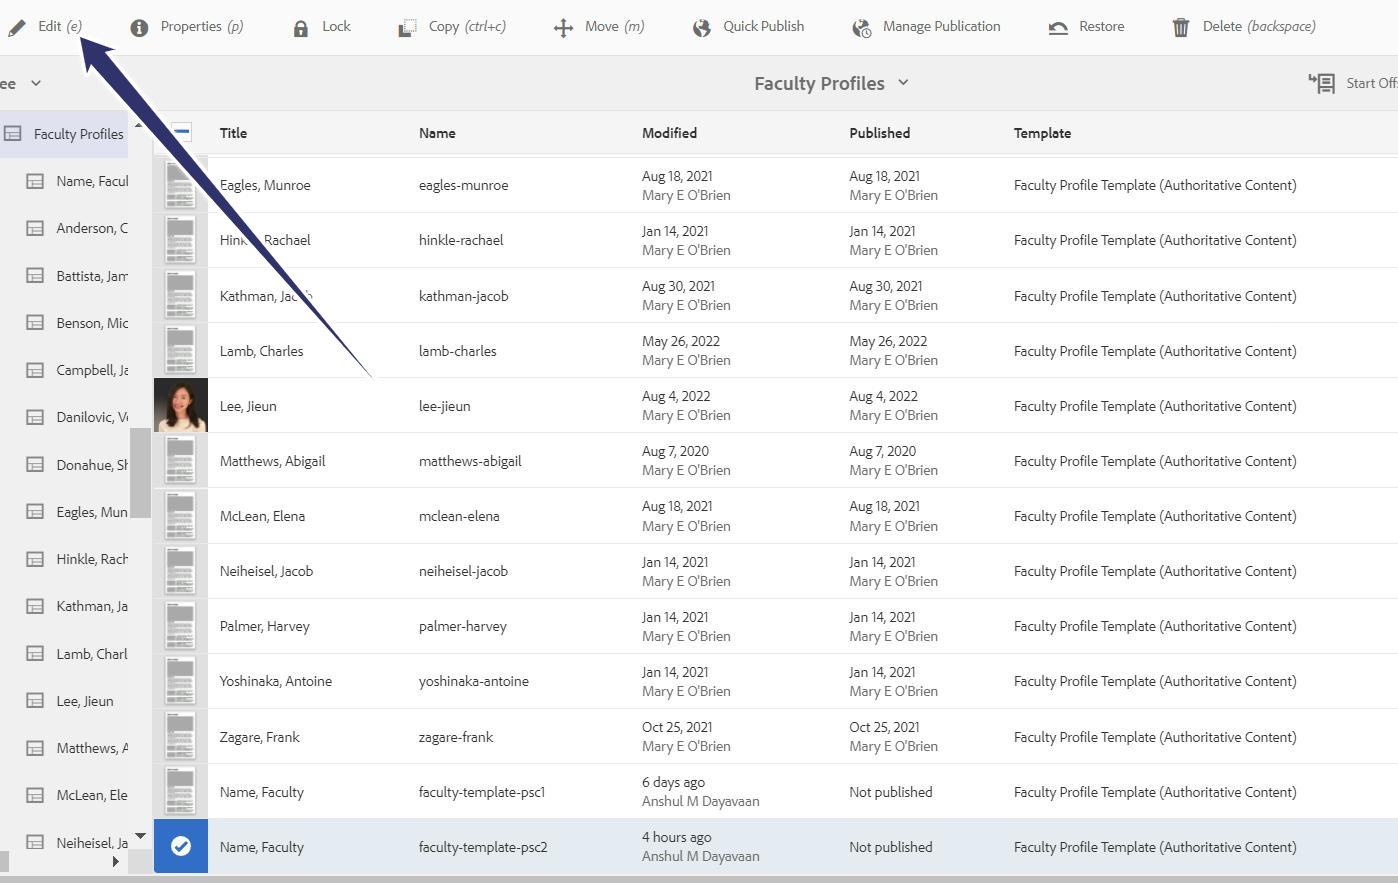
- Select the thumbnail of the page (It should be modified a few seconds ago and generally is displayed at the bottom – if you don’t see it there, try refreshing your browser)
- Select “Edit” from the toolbar to open the profile in the Edit Console to begin editing the content
Step 5: Click configure to edit Profile info
Once you’ve selected Edit from the Sites Console, you’ll be in the Edit Console where you’ll be able to customize the profile content for the new faculty member.
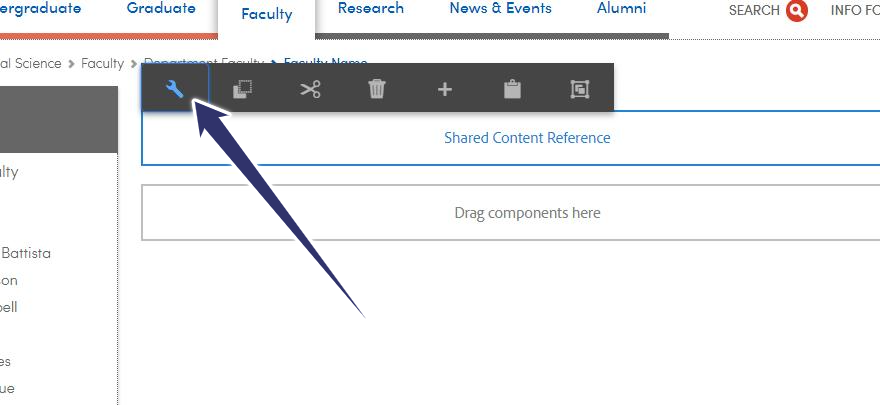
- Click once on the profile info component. A floating toolbar should appear above it.
- Click ‘Configure’ (The wrench icon ).

Step 6: Edit profile info as required
- Update and edit the details as required.
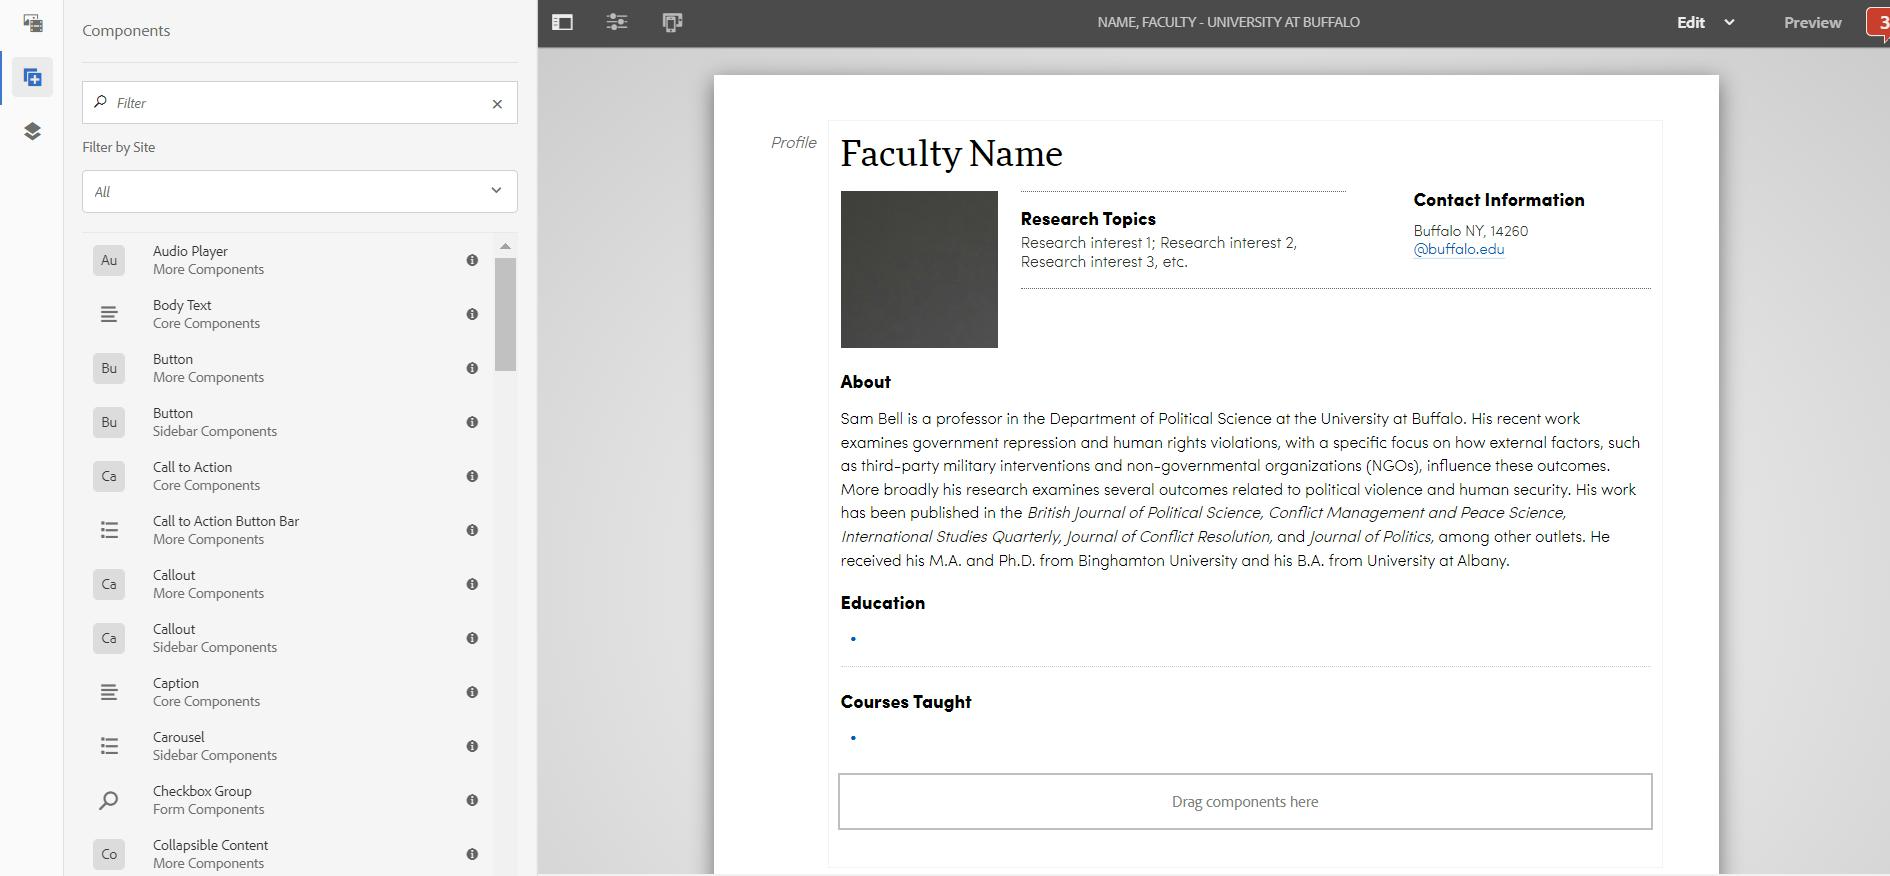
For each profile page, there are three default editable areas, a Profile, a Teaser, and an additional content area (usually for the Tabs component).
Profile Area
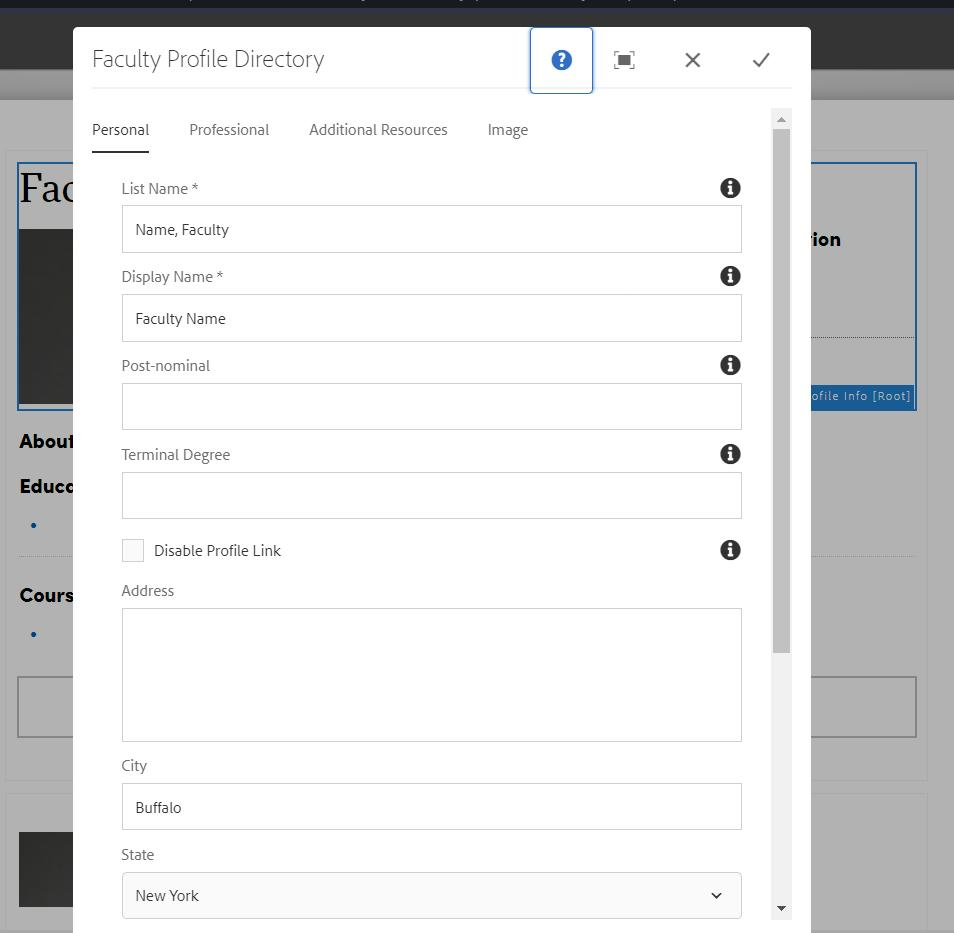
This area has a series of tabs: Personal, Professional, Additional Resources, and Image.
- List Name
- Used as descriptive title for Lists and for alphabetical sorting.
- List their preferred full name, as used for scholarship, in reversed normal order.
- Must follow this standard: "Bull, Victor" or "Bull, Victor E."
- Used as descriptive title for Lists and for alphabetical sorting.
- Display Name
- Displays as main heading at top of their profile page.
- List their preferred full name, as used for scholarship, in normal order.
- Must follow this standard: "Victor Bull" or "Victor E. Bull".
- Post-nominal
- Displayed immediately after or below their name.
- List all academic degrees.
- Watch capitalization and do not punctuate; e.g. BS, EdM, MBA, PhD. (See UB and AP style.)
- Displayed immediately after or below their name.
- Terminal Degree
- Only displayed in the List view.
- List only the highest degree earned.
- Disable Profile Link
- Use if have only provided basic details for the teaser (name, title, contact details).
- Address
- This first field is usually a room number and campus building.
- If it matches an existing building, it will automatically link to the campus interactive map; e.g. Ketter Hall.
- This first field is usually a room number and campus building.
- Address 2
- Provide any secondary address details as needed, perhaps an office name.
- Provide any secondary address details as needed, perhaps an office name.
- City
- State
- Choose from dropdown list.
- Choose from dropdown list.
- Zip
- Phone
- Use international standard, area code in parentheses, followed by the seven-digit number; e.g. 716-645-1234.
- Fax
- Use international standard, area code in parentheses, followed by the seven-digit number; e.g. 716-645-1234.
- Email
- List one address only. It will be a clickable link.

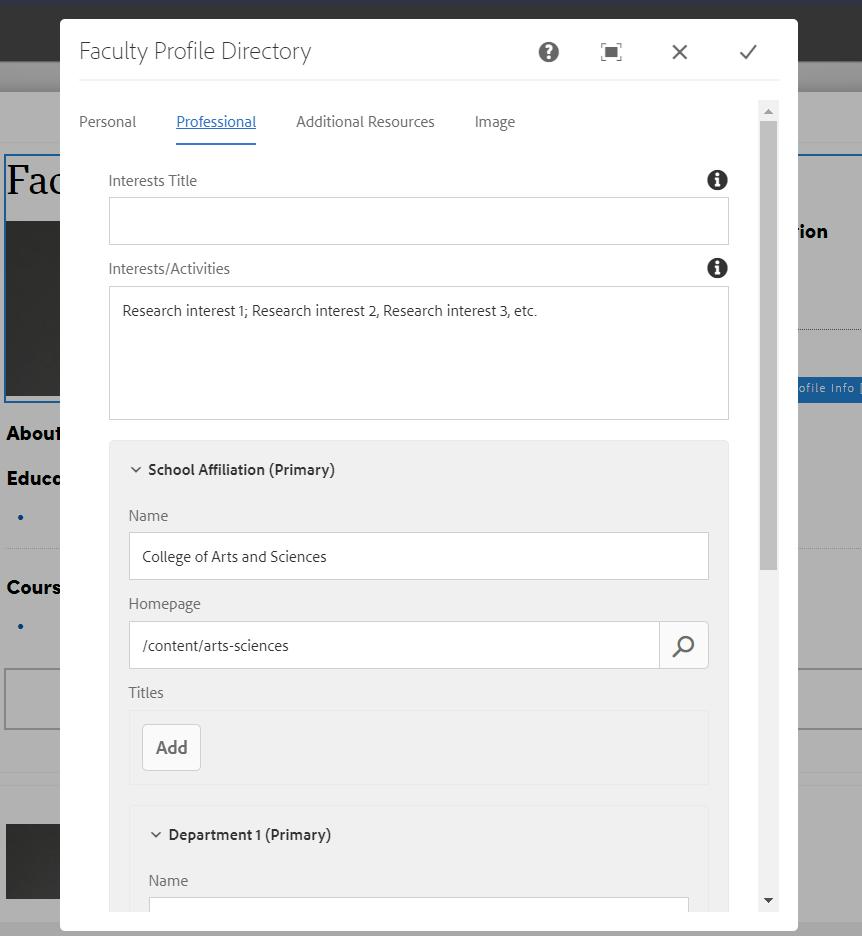
Research Interests/Creative Activities
- Display Title
- Provide a descriptive heading for the focus area (e.g. "Research Topics" or "Creative Activities").
- Defaults to "Research Topics."
- Provide a descriptive heading for the focus area (e.g. "Research Topics" or "Creative Activities").
- Interest/Activity
- List major scholarly interest areas, separated by semi-colons.
- School Affiliation (Primary)
- Name - Formal name of their primary school.
- Homepage (URL)
- Titles - Provide their formal title at the school level, without abbreviations; e.g. "Dean." Click 'Add Item (+)' to add additional lines as needed.
- Name - Formal name of their primary school.
For Titles, list UB positions, with most important first (e.g. dean, chair, director, titled professorship, regular academic line). Best practice: list each title on a separate line, spell out in full and capitalize.
Department 1 (Primary)
- Name - Formal name of their primary department.
- Homepage (URL)
- Titles - Provide their formal title with their primary department, without abbreviations; e.g. "Associate Professor." Click 'Add Item (+)' to add additional lines as needed.
Department 2
- Name - Formal name of any affiliated department.
- Homepage (URL)
- Titles - Provide their formal title with this affiliated department, without abbreviations; e.g. "Research Associate Professor." Click 'Add Item (+)' to add additional lines as needed.
Department 3
- Name - Formal name of another affiliated department.
- Homepage (URL)
- Titles - Provide their formal title with this affiliated department, without abbreviations; e.g. "Clinical Research Professor." Click 'Add Item (+)' to add additional lines as needed.
School Affiliation (Secondary)
- Repeats same fields provided in School Affiliation (Primary).
School Affiliation (Tertiary)
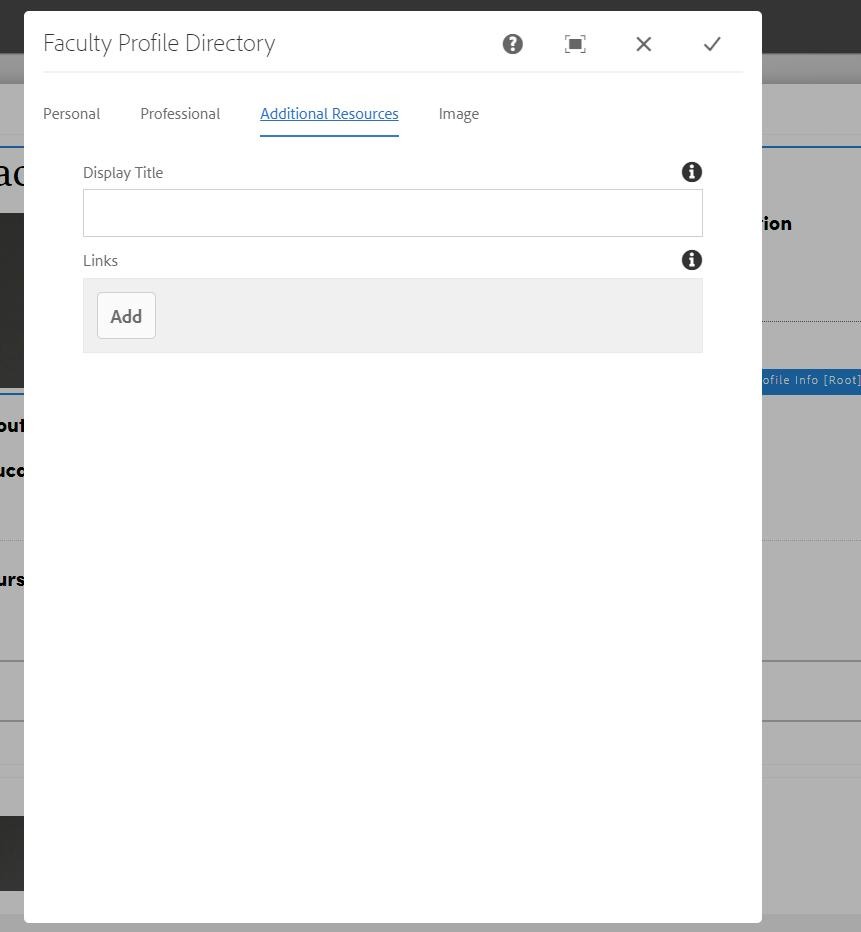
Here you can provide a series of links, usually for more information about the faculty member's work, or to related offices. These links will appear on the right, below their contact information.
Display Title
- This value will be displayed as the heading for any links that are provided below (e.g. "Background").
- If no links are displayed, the Display Titles will be hidden.
Links
- Click the 'Add Item (+)' to add one or more links. The first line holds the link, while the second holds the link text.
- Click the magnifying glass icons to select from UBCMS pages, or enter the complete URL (http://...) for external pages.
- Use the Up and Down buttons to specify the order that the web pages will be displayed in the list. The minus (-) buttons allow you to delete web pages while the + button enables you to add pages.
Add a suitable image, usually a portrait. This tab works the same as the standard Photo Component.
- The image will be displayed to the left of their entry.
- If you do not provide an image, a placeholder will be shown (e.g. a gray box or silhouette) unless you turn off the image by selecting 'Hide Photo'.
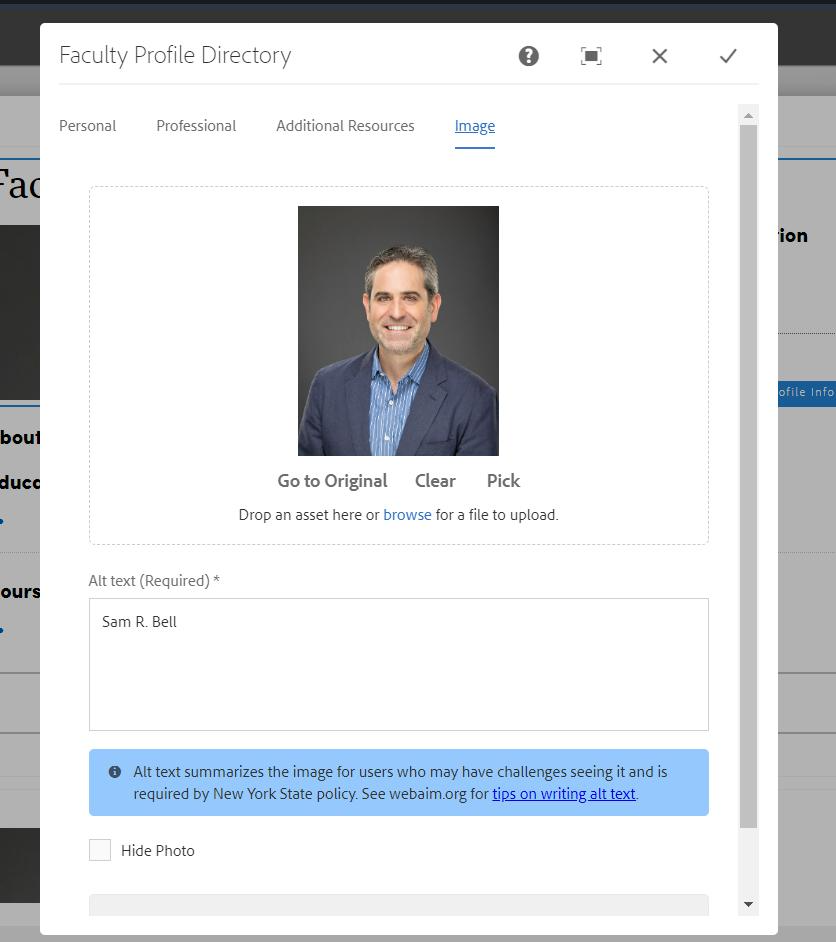
Alt text - Provide descriptive information about the image that allows people who cannot see the image to understand what they are missing (read more about image accessibility).
Hide Photo - Select if you do not wish the image to be seen.
- If you do not provide an image, a placeholder will be shown (e.g. a gray box or silhouette). Select 'Hide Photo' to prevent this placeholder or the portrait from being shown. The remaining content will be left aligned.
Teaser Area
Here you can add an image, usually a portrait, for display in Lists.
Additional Content Area
In the middle of the page, you can add components to display additional content. While you can include simple content like a secondary Title and Body Text, we intended this to house a Tabs component that would point to child pages of this profile page, possibly named 'Research,' 'Teaching,' and perhaps 'Service.'
Step 1: Copy an existing host profile
- Copy and paste one of the existing pages.
- Select the newly pasted page by clicking its thumbnail.
- Change the Name and Title of the page to the new Faculty name.
Note: Make sure the format matches the rest of the profiles (First-Name,Last-Name; Last-Name, First-Name etc)
- With the thumbnail highlighted blue, click “Move” in the Command Menu that is now revealed at the top of the screen.
- A new page will appear, with the Title and Name plus information about the page (last modification and the number of references to that page).
- Make any changes to Title and Name then click “Next”.
- Select the destination as the current location. Click “Move”.
- A new page will display requiring the destination
- More information on changing names and titles of pages can be found in the UBCMS documentation.
Select the thumbnail of the page you just created and click 'Edit’.
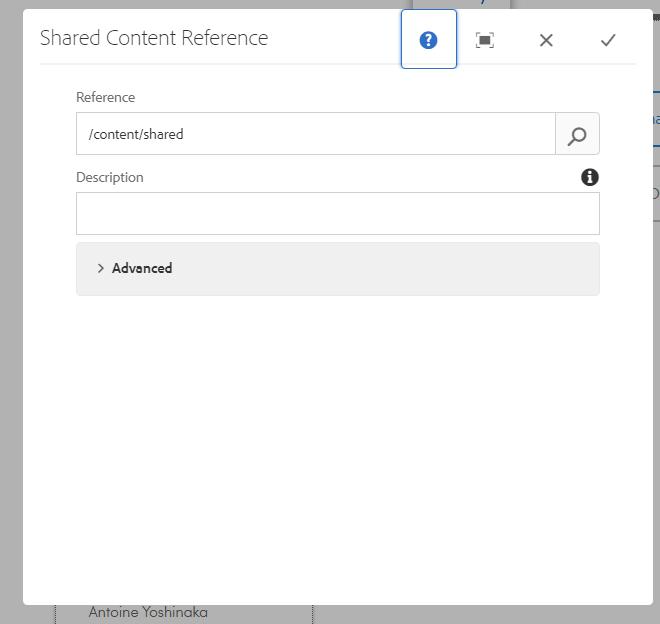
Step 2: Enter the reference to the shared Content profile
- Select the Shared Content Reference component
- Click configure (The wrench icon )
Navigate to the profile shared content, or enter the path of the profile that was created in shared content. For example: /content/shared/arts-sciences/dept-name/faculty/faculty-name
Step 3: Publish both the pages
Make sure to publish both the Shared Content profile and the Host Page.
- In the Sites Console, select the shared content profile that you want to publish. The Command Menu toolbar will appear at the top of the window. Choose Quick Publish.
- Repeat the same for the host page.